How to Prep Your Garage Floor for Epoxy
Convert and finish your garage floor into a clean looking, finished space with our garage floor epoxy system.
We carry a full line of epoxy products for garages and concrete floors, and have all the tools and machines you need as part of our rental program. The Benjamin Moore epoxy products are exceptional performing systems in a complete package for your garage floor, and can help you at every step of the way.
1 Preparation
It cannot be understated how important it is to ensure that your garage floor is properly cleaned, free of any oils or contaminants, and dry before applying epoxy. Proper preparation will ensure that your garage floor epoxy system is properly adhered and has a long life.
- Cleaning and Degreasing
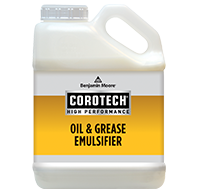
– Using an Oil & Grease Emulsifier can remove any oil, grease or other stains from your garage floor. - Mechanical preparation or Acid Etching
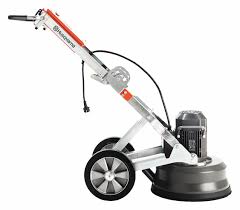
– A mechanical floor grinder will remove the smooth surface of the concrete and open it up for a primer so it can adhere and penetrate the concrete. It is generally easier and more recommended than acid etching.
– Acid Etching can be used to open the concrete floor. After using acid etch, it must be neutralized with baking soda or ammonia. Please refer to this Technical Data Sheet for more information. - Fill and smooth cracks with a concrete caulking
2 Priming
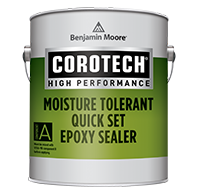
After your garage floor is dry, it is ready for a prime coat, which will help you build the floor coating from within the concrete out. It also locks down loose particles and promotes adhesion.
We recommend the V156 Corotech Moisture Tolerant Quick Set Epoxy Sealer, which provides an excellent base coat that dries fast, and has moisture tolerant qualities.
3 Epoxy
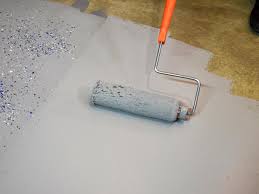
Now that the primer/sealer coat has dried (and follow the Technical Data Sheet), you can start with your epoxy. Follow the instructions provided.
- Mix the Part B Catalyst (quart) into the Part A (gallon) using a drill mixer for 5 minutes at low speed
- Let the epoxy induct for 30 minutes
- Brush and roll within 2-4 hours
- Apply decorative flakes
- Let it sit and dry!
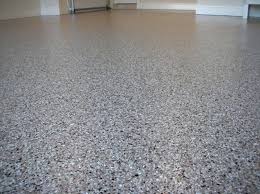
4 Urethane Clear Coat
Apply the urethane clear coat to seal and protect your epoxy floor to protect it from oil, grease, rain, or sunlight.
- Mix the Part B Catalyst (quart) into the Part A (gallon) using a drill mixer for 5 minutes at low speed
- Let the urethane induct for 30 minutes
- Brush and roll within 2-4 hours
- Let it sit! At this point you’re done. You will want to wait 7 days to park your vehicles in your garage, but you can walk on it after 24 hours.
Frequently Asked Questions
Expect to take 2-3 days, depending on weather and how much preparation is required. On the first day, you can grind the floor, fill cracks, and complete the prime coat. On the second day, you can do the epoxy, and if you’re in for a long day, you can complete the top coat, or wait until the next day.
You’ll be able to walk on it after 12 hours, but we recommend at least 7 days before you pull your car into the garage.
Generally not, unless you have heated floors. The surface temperature of your concrete needs to be ~10-16 degrees for the epoxy to properly adhere.
A bit, but we provide a HEPA concrete vacuum that attaches to the concrete grinder to clean up any dust. You’ll need to sweep the concrete after, however.
Whenever possible, we recommend grinding the floor over acid etching. Acid etching can work, but the profile of the concrete will be better and more suitable for epoxy with machine abrasion.
No problem! Using the floor grinder with the correct heads will remove the existing coating.


